항해 99 6주차 Clone_Stagram [WIL]

Clone_Stagram
항해99 6주차는 자신이 배운 주특기를 가지고 실제적으로 운영되는 웹사이트를 골라서 똑같이 기능을 구현하고 뷰를 완성하는 클론코딩을 하는 시간이다. 저희조는 인스타그램을 클론코딩하기로 했고, 인스타그램에서 게시물, 댓글 CRUD를 구현하고 로그인 회원가입, 게시물 좋아요 기능을 구현했습니다. 그리고 프론트와 백엔드가 처음으로 합을 맞춰보는 시간이였습니다.
CloneStagram
인스타그램 클론코딩 웹사이트입니다.
clonestagram.shop
leedaeho1188/hh99_clone_coding_insta_frontend
Contribute to leedaeho1188/hh99_clone_coding_insta_frontend development by creating an account on GitHub.
github.com
<느낀점>
이번 클론코딩은 다사다난 했지만, 여러모로 많은것을 배울 수 있는 시간이였던 것 같다. 인스타그램을 클론코딩을 하면서 인스타그램 view를 분석하면서 어떻게 css를 사용해야하는지 많이 배웠고, 내가 생각지 못했던 많은 기능들을 접하면서 내 견문이 더 넓어진 것 같다. 처음들어보는 Axios를 사용해서 서버와 통신하는게 너무 어려워 보였지만, 막상 공부하고 구현해보니까 이미 firebase와 연결해서 데이터를 주고받았던것보다 오히려 더 유동적이고 간편한 느낌이였다. 원래는 조 구성이 프론트 2명 백엔드 2명이였는데, 첫날에 백엔드 한 분이 나가셔서 백엔드 담당이 한 분으로 줄었다. 그래서 기다리는 시간이 좀 많아졌다. 기다리는 시간에 무작정 기다리는게 아니라 여러가지 미리 준비를 할 수 있었는데 그럴 생각을 못했다. 더 많은 기능을 구현하고 싶었지만, 시간이 부족해서 그러지 못한게 아쉬움이 남는다.😗
하지만, 다른 사람과 협업할 때 내가 어떤 마음가짐으로 임해야하는지에 대해서 많이 생각해보는 계기가 되었던 것 같다. 나와 실력이 비슷한 사람과 협업할 수 있지만 나보다 잘하거나 나보다 못하는 사람과 협업을 할 수 있다. 그럴 때 내 마음이 조급해지는 것이 아니라 차분하게 남과 비교하지 않고 힘들어하는 팀원을 위해서 친절하게 설명해줄 수 있는 사람이 되어야겠다는 생각을 많이 했다. 결국 개발이라는 것도 혼자서 잘하는게 아니라 도움을 받고 도움을 주는것이 당연스러운 그런 팀 협업이라 생각한다. 😀
<배운것>
새로 배운 개념
1. Axios를 사용해서 서버와 데이터를 주고 받았습니다.
2. Mock API를 이용해서 서버와 데이터를 주고받기 전에 내 데이터가 잘 보내지고 받아지는지 실험했습니다.
기능 구현
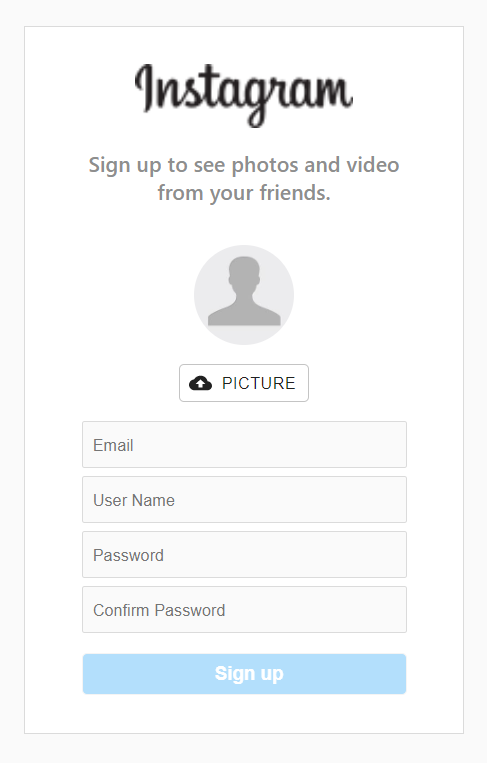
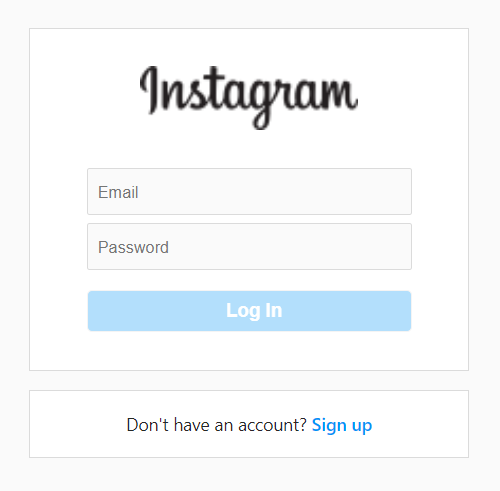
1. 로그인 & 회원가입
로그인 회원가입은 firebase에서 Authorization을 사용해서 구현했습니다. 회원가입에는 사용할 아이디를 이메일 형식으로 만들게했고, 유저 이름, 비밀번호, 프로필 사진을 첨부하게했습니다. 프로필 사진을 따로 넣지 않으면 default로 되었있는 이미지를 넣었습니다. 로그인을해야 게시물을 볼 수있게 App.js에서 조건부 렌더링을 사용했습니다.
function App() {
  const dispatch = useDispatch()
  const _session_key = `firebase:authUser:${apiKey}:[DEFAULT]`;
  const is_session = sessionStorage.getItem(_session_key) ? true : false;
  const is_login = useSelector((state) => state.user.is_login)

  React.useEffect(() => {
    if(is_session){
      dispatch(userActions.loginCheckFB())
    }
  },[])
	//로그인 한 상태에서만 게시물들을 보고 작성할 수 있게 했습니다.
  if (is_login){
    return (
      <ReactContainer>
        <Header/>
        <ConnectedRouter history={history}>

        <Switch>
          <Route path="/" exact component={PostList}/>
          <Route path="/upload" exact component={PostWrite}/>
          <Route path="/upload/:id" exact component={PostWrite}/>
          <Route exact component={NotFound}/>
        </Switch>


        </ConnectedRouter>
      </ReactContainer>
    );
  }
  	//로그인하지 않았을 때는 메인 페이지로 들어가도 로그인 화면만 나오도록 했습니다.
  return(
    <ReactContainer>
      <ConnectedRouter history={history}>
        <Switch>
          <Route path="/signup" exact component={SignUp} />
          <Route path="/" exact component={Login} />
          <Route component={NotFound}/>
        </Switch>
      </ConnectedRouter>
    </ReactContainer>
  )

}
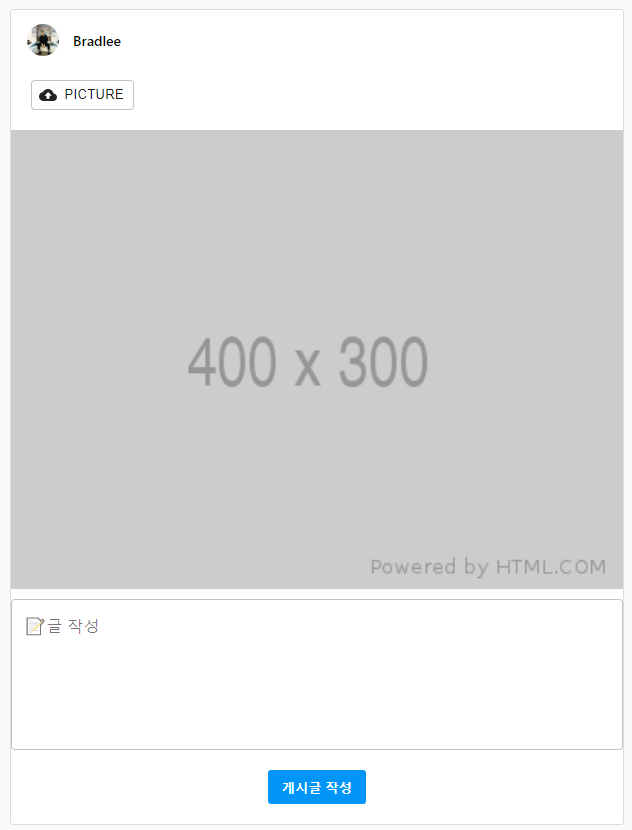
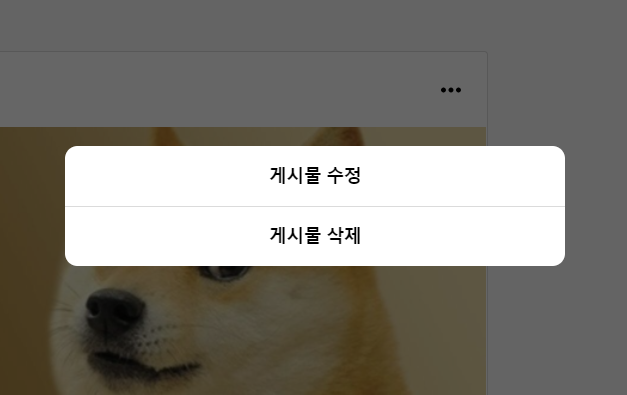
2. 게시물 C.R.U.D.
게시물 작성, 보여주기, 수정, 삭제 기능들을 axios를 이용해서 백엔드와 데이터를 주고 받으면서 구현했습니다. 게시물을 작성할 때는 유저정보와 게시물 정보를 같이 넣어서 서버에 보내줬습니다. 유저정보는 게시물을 보여줄 때, 수정, 삭제할 때 필요합니다. 해당 게시물을 작성한 유저에게만 수정 삭제할 수 있게 했습니다.
게시물 CRUD 구현한 모듈 코드입니다.
// 작성한 게시글을 서버에 보내는 작업을 합니다.
// 첨부한 사진은 firebase Storage에다가 저장을 하고 url만 받아와서 서버에 보냈습니다.
// 게시글 작성자 데이터와 게시글 내용을 서버에 보냈습니다.
// 그 후에 response로 게시물 id를 받아서 리덕스 스토어에 게시물 데이터와 같이 저장했습니다.

const addPostAX = (post) => {
  return function (dispatch, getState){
    const _user = getState().user.user

    const user_info = {
      user_name: _user.user_name,
      user_id: _user.user_id,
      profile_url: _user.profile_url
    };

    let _post = {
      contents: post.contents,
      insertDt: moment().format("YYYY-MM-DD HH:mm:ss"),
      likeCnt: 0,
      likeId: [],
    };
    const _image = getState().image.preview;

    const _upload = storage
      .ref(`images/${user_info.user_id}_${new Date().getTime()}`)
      .putString(_image, "data_url");

    _upload.then((snapshot) => {
      snapshot.ref.getDownloadURL()
      .then((url) => {
        axios.post("http://15.164.217.16/api/contents", {
      ..._post,  img : url, userName: user_info.user_name,
      userId: user_info.user_id, myImg: user_info.profile_url,
      }).then((response) => {
        console.log(response)
        let post_list = {
          id: response.data.id,
          post_image_url : url,
          ...user_info,
          contents: post.contents,
          insert_dt: moment().format("YYYY-MM-DD HH:mm:ss"),
          like_cnt: 0,
          like_id: [],
        }
        dispatch(addPost(post_list))
        dispatch(imageActions.setPreview("http://via.placeholder.com/400x300"))
        history.replace("/")
      })
      }).catch((error) => {
        console.log(error)
        window.alert("게시물 저장이 정상적으로 되지 않았습니다.")
      })
    })
  }
}

// DB에 저장되어있는 게시물들을 다 가져옵니다.
// reponse로 받은 게시물 데이터를 하나씩 .foEach를 써서 분류하고
// 리덕스 store에 저장했습니다.

const getPostAX = () => {
  return function (dispatch, getState){
    axios.get("http://15.164.217.16/api/contents")
      .then((res) => {

      console.log(res.data);

      let post_list = [];

      res.data.forEach((_post) => {

        let post = {
          id: _post.id,
          content: _post.contents,
          insert_dt: _post.insertDt,
          user_name: _post.userName,
          post_image_url: _post.img,
          profile_image_url: _post.myImg,
          user_id: _post.userId,
          like_cnt: _post.likeCnt,
          like_id: _post.likeId,
        };

        post_list.unshift(post);
      })
      console.log(post_list);

      dispatch(setPost(post_list));

    }).catch((err) => {
      window.alert("게시물을 가져오는데 문제가 있어요!")
    })
  }
}

// 게시물 데이터를 수정할 때 게시물 이미지도 수정이 되었을 때와 되지 않을 때를 나눴습니다.
// 이미지가 수정되지 않았으면 기존 이미지 url과 수정된 게시글을 업로드합니다.
// 이미지가 수정되었으면 수정된 이미지를 firebase Storage에 저장을하고 url을 받아와서 서버에 보내줍니다.
// 수정된 게시글 data는 리덕스 store에도 저장을 합니다.
const editPostAX = (id, post) => {
  return function (dispatch, getState){
    if(!id) {
      console.log("게시물이 없어요!")
      return;
    }
    const _image = getState().image.preview;
    const _post_idx = getState().post.list.findIndex((p) => p.id == id);
    const _post = getState().post.list[_post_idx];

    let _edit = {
      contents: post.contents,
    }

    if (_image == _post.post_image_url){
      axios.put(`http://15.164.217.16/api/contents/${id}`, {
        ..._edit, img: _image
      })
        .then((response) => {
          console.log(response)
          dispatch(editPost(id, {..._edit}))
          history.replace("/")
        });

        return;
      } else {
        const user_id = getState().user.user.user_id;
        const _upload = storage
          .ref(`images/${user_id}_${new Date().getTime()}`)
          .putString(_image, "data_url");

        _upload.then((snapshot) => {
          snapshot.ref.getDownloadURL().then((url) => {
            return url;
          })
          .then((url) => {
            axios.put(`http://15.164.217.16/api/contents/${id}`, {
              ..._edit, img: url,
          })
          .then((response) => {
          console.log(response)
          let edit_list = {..._edit, post_image_url: url}
          dispatch(editPost(id , edit_list))
          history.replace("/")
        });
        }).catch((err) => {
          window.alert("게시물 수정에 문제가 있어요!")
        })
      })
    }
  }
}

// 게시글 id값을 보내면 서버에서 db에 저장된 해당 id를 가진 게시물을 삭제합니다.
// 그리고 리덕스 store에서도 저장된 게시물을 삭제해서 바로 삭제된것이 적용되게 합니다.

const deletePostAX = (id) => {
  return function (dispatch, getState){
    axios.delete(`http://15.164.217.16/api/contents/${id}`)
      .then((res) => {
        dispatch(deletePost(id));
        history.replace("/");
      }).catch((err) => {
        window.alert("게시물 삭제에 문제가 있어요!")
      })
  }
}
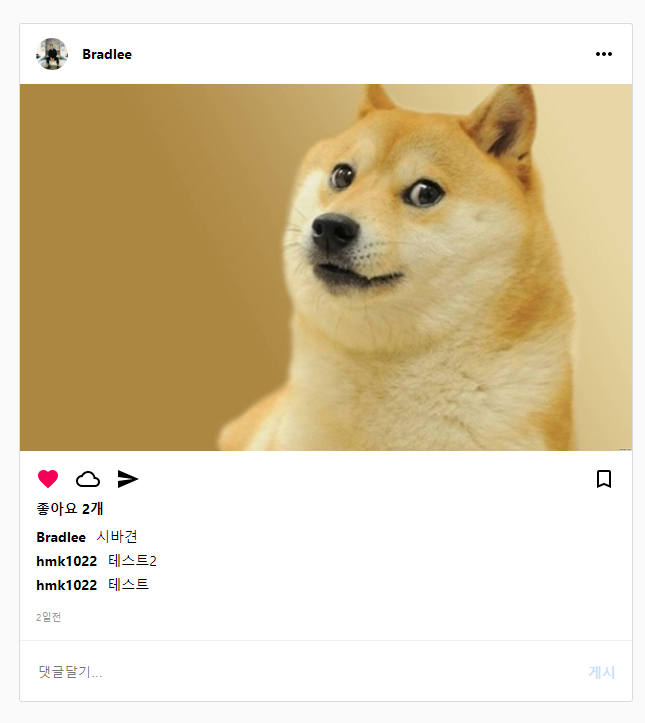
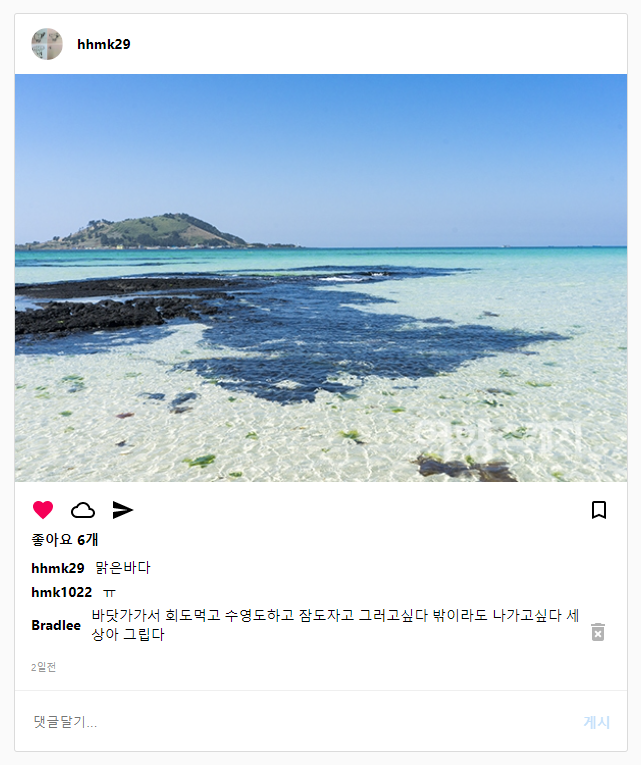
3. 댓글 C.R.D.
댓글 작성, 보여주기, 삭제 기능을 구현했습니다. 수정 기능까지 해야될 필요성을 못느꼈기에 수정기능은 구현하지 않았습니다. 댓글 데이터에는 게시물 고유 아이디를 같이 넣어서 어느 게시물 댓글인지 파악했습니다. 게시물에 댓글이 점점 많아지면 게시물의 크기가 너무 커지기 때문에 메인 페이지에서는 최신 댓글 2개만 보이게 했고, 나머지 댓글들은 게시물 디테일 모달을 만들어서 게시물 사진을 클릭했을 때 모달로 나오게 구현했습니다.

댓글 CRD 구현한 모듈 코드입니다.
// addCommentAX는 댓글과 댓글 단 사람의 정보 해당 게시글 정보를 담아서 서버에 보내는 작업을 합니다.
// 그리고 리덕스 store에 그 정보들을 저장해서 바로 화면으로 새로적은 댓글이 보이게 합니다.

const addCommentAX = (comment, post_id) => {
  return function (dispatch, getState) {
    console.log(comment)
    let _comment = {
      contentsId: post_id,
      userId: comment.user_name,
      comment: comment.comment,
      myImg: comment.profile_url,
      commentDt: moment().format("YYYY-MM-DD HH:mm:ss")
    }
    console.log(_comment)
    axios.post("http://15.164.217.16/api/comments/", {
      ..._comment
    })
    .then((res) => {
      console.log(res.data)
      let comment_list = {...comment, id: res.data.id}
      dispatch(addComment(comment_list, post_id))
    }).catch((err) => {
      console.log(err.response)
      window.alert("댓글 작성에 문제가 있어요!")
    })
  }
}

// 화면을 리로드를 했을 때 리덕스 store에 있는 정보들이 다 날아가기 때문에
// DB에 저장해뒀던 해당 게시물의 댓글 정보들을 response로 받아서 다시 리덕스 store에 저장합니다.

const getCommentAX = (post_id = null) => {
  return function (dispatch) {
    if (!post_id){
      return;
    }
    console.log(post_id)
    axios.get(`http://15.164.217.16/api/comments/${post_id}`)
    .then((response) => {
      console.log(response)

      let comment_list = []
      response.data.forEach((_post) => {
        let comment = {
          comment: _post.comment,
          user_name: _post.userId,
          profile_url: _post.myImg,
          comment_dt: _post.commentDt,
          id: _post.id,
        }
        comment_list.unshift(comment)
      })
      console.log(comment_list)
      dispatch(setComment(comment_list, post_id))
    }).catch((error) => {
      window.alert("댓글을 불러올 수 없습니다.")
    })
  }
}

// 해당 댓글 id값을 서버에 보내서 삭제를 시킵니다.
// 리덕스 store에서도 같은 id값을 가진것을 찾아서 삭제 시킵니다.

const deleteCommentAX = (id, post_id) => {
  return function (dispatch, getState){
    axios.delete(`http://15.164.217.16/api/comments/${id}`)
      .then((res) => {
        dispatch(deleteComment(id, post_id));
      }).catch((err) => {
        window.alert("게시물 삭제에 문제가 있어요!")
      })
  }
}


export default handleActions(
  {
    [ADD_COMMENT]: (state, action) => produce(state, (draft) => {
      //  draft.list[action.payload.post_id] 안에 아무것도 없는 상태이면 배열도 없는 상태여서
      // unshift도 되지 않습니다. 그래서 아무것도 없는 경우일 때를 따로 설정했습니다.
      if(!draft.list[action.payload.post_id]){
        draft.list[action.payload.post_id] = [action.payload.comment]
        return
      }
      draft.list[action.payload.post_id].unshift(action.payload.comment)
    }),
    [SET_COMMENT]: (state, action) => produce(state, (draft) => {
      draft.list[action.payload.post_id] = action.payload.comment_list
    }),
    [DELETE_COMMENT]: (state, action) => produce(state, (draft) => {
      let idx = draft.list[action.payload.post_id].findIndex((p) => p.id === action.payload.id);
      if(idx !== -1){
        draft.list[action.payload.post_id].splice(idx, 1);
      }
    }),
  },
  initialState
)
4. 게시물 좋아요 기능구현
게시물 데이터에 좋아요 숫자와 좋아요를 한 유저의 아이디를 저장했습니다. 게시물 정보를 업데이트하는 형식으로 좋아요 기능을 구현했습니다.
좋아요 기능구현한 모듈 코드입니다.
// 좋아요 추가 삭제를 이 미들웨어하나로 구현했습니다.
const editLikeAX = (post, post_id) => {
  return function (dispatch) {
    console.log(post, post_id)
    axios.put(`http://15.164.217.16/api/contents/${post_id}`, {
      ...post
    }).then((response) => {
      console.log(post)
      let _post = {
        like_id: post.likeId,
        like_cnt : post.likeCnt,
      }
      console.log(_post)

      dispatch(editLike(_post, post_id))
    })
  }

}

// 수정한 좋아요 데이터를 리덕스 스토어에 저장했습니다.
[EDIT_LIKE]: (state, action) => produce(state, (draft) => {
      let idx = draft.list.findIndex((p) => p.id === action.payload.post_id);
      draft.list[idx] = { ...draft.list[idx], ...action.payload.post }
    })
좋아요 기능을 구현한 Component 코드입니다. 서버에서 게시물 데이터를 다 보내지 않으면 서버 오류가 걸린다고 해서 게시물 데이터를 다 담아서 보내줬습니다.
//좋아요를 추가하는 함수입니다.
const likeSubmit = () => {
    if(!is_login){
      window.alert("😀로그인 해야 할 수 있어요!")
      return
    }
    let like_id;
    if(props.like_id.length === 0){
      like_id = [user_info.user_id];
    } else {
      like_id = [...props.like_id, user_info.user_id];
    }
    let cnt = props.like_cnt + 1;

    let post = {
      userId: props.user_id,
      userName: props.user_name,
      contents: props.content,
      img: props.post_image_url,
      myImg: props.profile_image_url,
      insertDt: props.insert_dt,
      likeCnt : cnt,
      likeId : like_id
    }
    let post_id = props.id;
    console.log(post)
    dispatch(postActions.editLikeAX(post, post_id))
  }

// 좋아요를 취소하는 함수입니다.
  const dislikeSubmit = () => {
    let like_id = []
    like_id = props.like_id.filter((l, idx) => {
      if(l !== user_info.user_id){
        console.log(like_id)
        return [...like_id, l]
      }
    })
    let cnt = props.like_cnt - 1;
    let post = {
      userId: props.user_id,
      userName: props.user_name,
      contents: props.content,
      img: props.post_image_url,
      myImg: props.profile_image_url,
      insertDt: props.insert_dt,
      likeCnt : cnt,
      likeId : like_id
    }
    let post_id = props.id;
    dispatch(postActions.editLikeAX(post, post_id))
  }